~ inspire.create.share. ~ inspire.create.share. ~ inspire.create.share. ~ inspire.create.share. ~ inspire.create.share. ~ inspire.create.share. ~

Monday, August 31, 2015

Beautiful Bunch Note Card

This is a sweet and simple note card I used for one of my swaps.  I think square cards are so fun to make and this one is 4 1/4" square.  The flowers are stamped in Delightful Dijon ink and are from the Beautiful Bunch stamp set.  I punched them out using the Fun Flower Punch and popped them up with some Dimensionals.  The sentiment is from the Best Thoughts host set on page 180 of the Annual Catalog, and the bold strip of color is a piece of English Garden Designer Series Paper.  I thought it did a great job of adding a little more effect and dimension to the card.  Mossy Meadow is such a rich color!  Doesn't it just have an "end of summer" feel to it?

I look forward to your comments!


Thursday, August 27, 2015

Triple Time Stamping

Today I want to share a lovely example of Triple Time Stamping using the Awesomely Artistic stamp set, Brick Wall Embossing Folder, and Bold Butterfly Framelits.  I also used the Scalloped Oval Punch and Project Life Cards & Labels Framelits to accent the sentiment.  The finished product is very impressive, but the skill level and effort involved is minimal.

To make this card, simply layer your pieces of Very Vanilla cardstock, adhering them together with a small bit of SNAIL Adhesive.  Stamp your images (put your Stampin' Pierce Mat under the cardstock for a better result) and color in with Blender Pens.  I stamped the flowers with Elegant Eggplant ink and colored the flowers and leaves with Perfect Plum and Mossy Meadow ink using a Blender Pen.  The light speckles were done with Mint Macaron ink, stamped off once.  Then run the stack through the Brick Wall Embossing Folder using your Big Shot.  Separate your pieces of cardstock and lightly sponge them with Sahara Sand ink.  Then adhere them to the Perfect Plum cardstock and put them all together on the card base.  I used Mint Macaron cardstock for my card base.  Finishing with the sentiment and butterfly was the final step. 
You can use whatever measurements you want for the layers.  I tried it with a 1/4" border and a 1/8" border, but I found that I liked it best with a 3/16" border of Perfect Plum showing.  These are the measurements I used:  Very Vanilla Pieces - 1 15/16" x 3 3/16",  2 13/16" x 4 1/16",  5 1/16" x 3 13/16".
Perfect Plum Pieces - 2 1/8" x 3 3/8",  3" x 4 1/4",  4" x 5 1/4".  The card base is a regular A-2 card measuring 5 1/2" x 4 1/4". 

I would love to hear your comments about my card!  Please leave a comment below.

Monday, August 24, 2015

Explosion Box Thank You

This is one of my favorite projects!  It was a thank you to my friend, Julie, for taking care of my and my daughter's cats while we were on vacation.  There were 4 kitties to care for and one needed to be given medication regularly.  She truly went out of her way to give them love and attention while we were gone, so I needed a very special way to say "thank you."

Here it is:  A box/gift card holder that packs quite an impact!

I used Me = Grateful, One Big Meaning, Friendly Wishes, and B.Y.O.P stamp sets for the sentiments.   The sentiment on top was cut out using Lots of Labels Framelits.  I also used Watercolor Wings, Birthday Blossoms, and Petite Petals stamp sets for the butterflies and flowers and punched out the flowers with the matching Petite Petals Punch.  There is one butterfly on each side of the box.  The butterflies were cut out using the Bold Butterfly Framelits and Butterflies Thinlits.  I used the new Fine-Tip Glue Pen (available September 1, 2015) to adhere the black butterfly detail to the stamped image.  Such a great adhesive!

Note:  When you first get it, you will have to screw off the black cap to remove the seal before using.  Replace the black cap and unscrew the white cap to dispense the glue.  Don't squeeze hard or you will have a big blob of glue!  Hee hee, ask me how I know??  ;)  When you are finished using it, carefully line up the long pin in the cap with the pin applicator to close it.  This should prevent the glue clog that is often the problem with liquid adhesives.

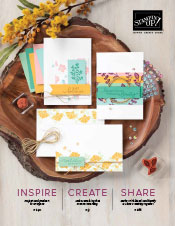
The paper for the box and lid is from Color Me Irresistible Specialty Designer Series Paper.  That paper is oh, so beautiful with colored embossed images!  It also has white on white embossed images.  Other paper used was Whisper White and Bermuda Bay cardstock.  A Bermuda Bay Stampin' Write Marker colored in a few words for more colorful impact.

Please leave me a comment and let me know what you think of my creation!


Thursday, August 20, 2015

New Home Card

This is one of the cards I had on display at my New Catalog Open House in June.  It is a quick and simple card to welcome friends into a new home.  I used Happy Notes stamp set for the sentiment and the Lots of Labels Framelits to cut out the image.  I just sliced off the bottom of the image after die cutting and wa-la!  I had a new shape!

The colors used were Blackberry Bliss and Sahara Sand.  I also used the new Blackberry Bliss 5/8" Striped Cotton Ribbon and the Elegant Dots Embossing Folder.  A couple quick staples was the finishing touch.  What do you think of my quickie card?


Monday, August 17, 2015

Mickey Birthday

Here's a birthday greeting from the Mouse Himself!  Look how simple it was to make a cute Mickey Mouse birthday card using Circle Punches, the Large Polka Dots Embossing Folder and a retired piece of chipboard colored with Black Staz-On ink!  I used a black Sharpie to finish the edges so no gray chipboard color would show.  The sentiment is from the Age Awareness stamp set.  Hint:  When stamping directly on cardstock to be embossed, always stamp first, then emboss, otherwise you may get an uneven image.

I love hearing comments from you!  Please leave a note below.


Thursday, August 13, 2015

Have Some Cake!

This lovely cake is made of cardstock and each piece contains our brand new Silver and Gold Thread tied up in a neat little tissue package.  The cake, stand and banner were all made from the Sweet Stack Project Kit on page 152 of your 2015-2016 Annual Catalog.  I didn't realize when I ordered my supplies that the stamp set to decorate the cake pieces was sold separately, so I had to take some creative license and used the Work of Art stamp set to decorate the outer edges of the cake pieces.  On the inside edges I stamped the dots from the Watercolor Wings stamp set to make it look like the cake layers.  The look wasn't perfect, but it worked.  The first 20 ladies who RSVP'd for my Open House in June each got to take home a piece of cake.

When you order your Sweet Stack Project Kit, be sure to include the Sweet Stack stamp set on page 66 of the 2015-2016 Annual Catalog so you don't have to go searching through your stamps to find a suitable substitute!  This kit is perfect for showers and parties.  You can fill the pieces with anything you like.

The name tags I made for everyone, visible on the left are cut out with the Lots of Labels Framelits; and the water bottles on the right are decorated with Envelope Paper and a butterfly made from the Watercolor Wings stamp set, cut out with the Butterflies Thinlits Dies.  What a fun and simple way to dress up a water bottle!  Try it for your next gathering!


Monday, August 10, 2015

Gift Bags

These are the gift bags I made for the ladies who RSVP'd to my Open House in June.  Of course, they are filled with Stampin' goodies!  They were made using the new Gift Bag Punch Board, Envelope Paper, and 1" Dotted Lace Trim in matching 2015-2017 In Colors.  The tags were stamped with the Sprinkles of Life stamp set found on the inside of the back cover of your 2015-2016 Annual Catalog.  This the new Ronald McDonald House Charities stamp set.  For everyone who purchases this stamp set, Stampin' Up! will donate $3 to the RMHC to help support families when their children are receiving medical treatment far from home.  So if you have already purchased this set, THANK YOU!  If it's still on your wish list, place your order soon!  It is item #139971, $21 for 22 photopolymer stamps.


Thursday, August 6, 2015

Punch Art

Here's a little Punch Art fun from the past.  This is a card we made in a Fun Day Sunday Punch Art Class last year (or maybe the year before).  I can't remember for sure.  She's soooo sweet!  I call her Henrietta Hippo.


Monday, August 3, 2015

Beach Vacation!

Hello!
I don't have a card post to share with you today because I have been on vacation for a family reunion.  We had almost 60 family members meet in Orange Beach, Alabama, for the week.  We stayed in 2 side by side homes on the beach.  It was an incredible week and I can't wait for the next one.  I have an amazingly close family and we plan these events every 5 years.  As the families grow, so does the needed space to house us all on these special occasions.  Here are a few images of my wonderful family!  I just have to share them with you.  You should see the picture with everyone in it!  I don't have that one yet, but I will share these smaller groups.

My children with me.  Wow, I look short standing next to them!


 My wonderful first cousins!


 Second generation cousins.


Some quiet games on the beach.  


Incredible musical talent from a 15-year-old!